Delivery
WIP
DCP
Digital Cinema Package - for screening in cinemas and at festivals.
The DCP format is a special format for cinema screenings. The DCP will be used for the screening of your project here at EFC. DCP files are also a common additional format to deliver to film festivals. It’s recommended to export DCPs from DaVinci Resolve. They can only be exported from DaVinci Resolve Studio, not the free version, and AVID Media Composer and Premiere Pro do not support exporting of DCPs.
If you are finishing your project in AVID Media Composer or Adobe Premiere Pro, then use the DNxHR-HQX export with subtitles, and import it into DaVinci Resolve. Set the settings in the project settings > Master Settings to match your export’s resolution.
How to export a DCP from DaVinci Resolve
Video setup
Go to the Delivery page.
Video Format
Select the Format DCP from the dropdown.
DCP Codec
Select the Codec Kakadu JPEG 2000.
DCP Type
Select the Type 2K DCI Flat or 2K DCI Scope depending on your film's needs.
See Resolution for more info.DCP Bitrate
Make sure the bitrate is under 250 Mbit/sec. Most projectors don't support bitrates above 250 Mbit/sec. For safety set it to 240 Mbit/sec.
Composition Settings Setup
For DCPs it's required to write several details about the film.
For starters open up the Composition Settings and write your name in the Issuer field.Content Kind
Next select the kind of content that you are exporting, in the Content Kind field. That will probably be SHR - Short.
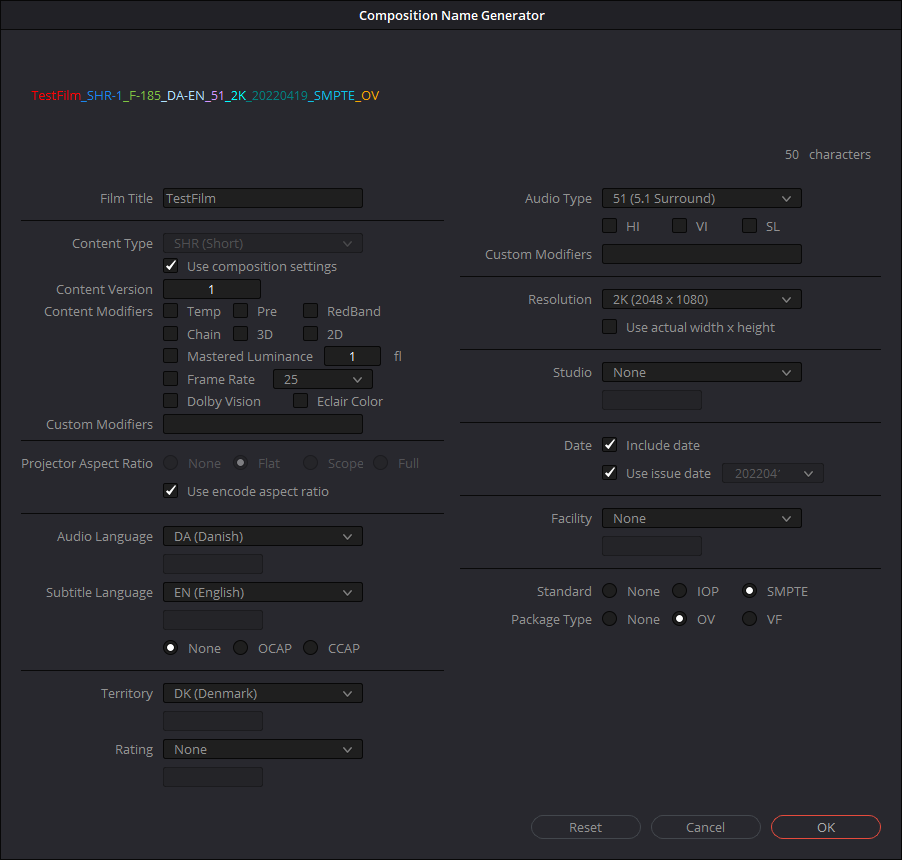
Composition Name
Click the Edit button next to the Composition Name field and fill out the field according to the following information. Once you're done click OK.
Subtitle setup
If you are using subtitles, make sure the subtitle format is set to Burn into video, in the Subtitle Settings at the bottom of the Render Settings section.
Audio setup
Select the following options on the audio tab.
Codec: PCM
Sample Rate: 48000
Configuration: Wild Track Format
And make sure the correct output bus is selected at Output Track 1. Ideally, this would be in surround sound. If you are exporting stereo, you'll get a warning message on export, but you can just ignore it and continue the export.Filename setup
Go to the File tab, and at Package name uses, select the option Composition name
Export
Select the location for the export at the top and click Add to Render Queue at the bottom of the Render Settings section.
In the Render Queue section to the right click Render All.
You'll notice that the colours will look quite weird. This is normal and the render will look correct once played back.
The output will be a folder titled the composition name. This folder contains all the files needed to play back the file.
To verify and playback the DCP after it has been exported use the Media page in Resolve and it will show up as a normal video file.