Delivery
High Quality for screening & archival
A version is needed for high-quality screenings and archival. Additional exports can also be made from this version at a later date.
Options
- Format: MXF OP1A
- Video
- Codec: DNxHR HQX 10 bit (for films shot with the Canon EOS C100 select DNxHR HQ 8 bit)
- Resolution: the resolution that best fits the film's aspect ratio. See the resolution section for more information.
- Audio
- Codec: PCM
- Sample Rate: 48000
- Bit Depth: 24
- Channels: if a surround sound version exists choose that, if not then export the stereo version.
You need to create a version with subtitles burned in, and one without any subtitles and titles or credits overlaying any footage.
- Subtitles
- Format: Burn into video
- Recommended style: reference the best practices.
Configuration
Follow along for setting up the options for your editing software
DaVinci Resolve
Setup
Go to the Deliver page and select the Custom Export preset at the top.
Video Format
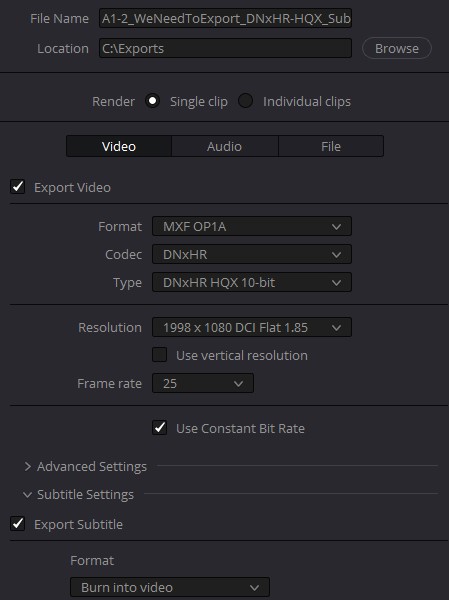
In the Video tab from the dropdown at Format select MXF OP1A
Video codec
From the dropdown at Codec select DNxHR
Codec Type
From the dropdown at Type select DNxHR HQX 10-bit
Resolution
Select the appropriate resolution either from the drop-down or select Custom and type it in yourself.
Subtitles
In the Subtitle Settings at Format select Burn into video from the drop-down.
Check Audio Settings
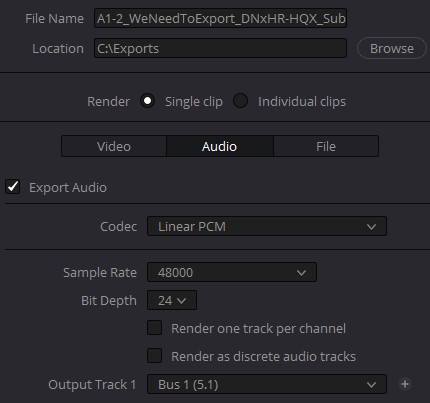
Go to the audio tab. Make sure the Sample Rate is at 48000, and Bit Depth at 24.
Audio Output
Select the appropriate output track for the export.
Render
Click Add to Render Queue at the bottom. The render job will show up in the queue to the right. Once you have the jobs queued that you want, click the Render All button.
AVID Media Composer
Step 1
Go to File -> Export or right-click the timeline in the bin and click Export, and choose the export location
Step 2
Select the preset SPRING EXPORT
Step 3
Check the options
Step 4
From the dropdown at Export As select: MXF OP1A
Step 5
In the video section at Video compression select: DNxHR HQX Avid OP-Atom
Step 6
In the audio section make sure the Sampling rate is at 48000, Bits per sample is 24, interleaved is ✅ checked, and select Mix according to the provided sound mix.
Step 7
At last click Save and Export the film.
Adobe Premiere Pro
Setup export
Go to File -> Export -> Media or press the shortcut CTRL + M.
Click the filename at Output Name and select the export location and filename of the export.Video format
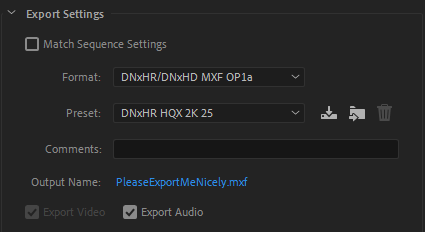
In the dropdown at Format select DNxHR/DNxHD MXF OP1a
URSA video settings
Select the Preset DNxHR HQX 2K 25 if you filmed on the BMD URSA G2.
C100 video settings
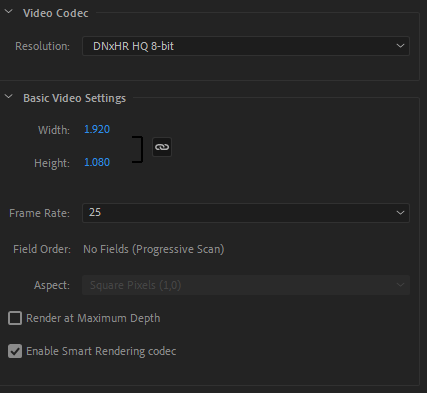
If you filmed on the Canon EOS C100, select the Preset DNX HQ 1080p 25. Next go to the video section below and change Resolution to DNxHR HQ 8-bit.
Audio settings
In the Audio tab, select the number of channels that you have.
That would usually be:
2 channels for stereo
6 channels for surround sound
Make sure the Sample Size is 24 bit.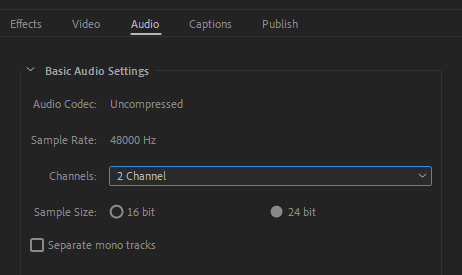
Subtitles
Go to the subtitles and Captions tab and select the format to be burn in.
Export
At last click Save and Export the film.